Published: 8/14/2025
Visper is a data platform that lets you query your data and build dashboards using a simple chat interface (more than just Text 2 SQL). It turns your data into a conversation. No more switching between SQL editors, BI tools, and Slack threads—just chat with your database, build live dashboards, and collaborate in real time.
This guide will walk you through the process of connecting your MySQL database to Visper, allowing you and your team to use natural language to query data and create live dashboards.
1. Create a MySQL Datasource
First, you need to add your MySQL database as a datasource in Visper.
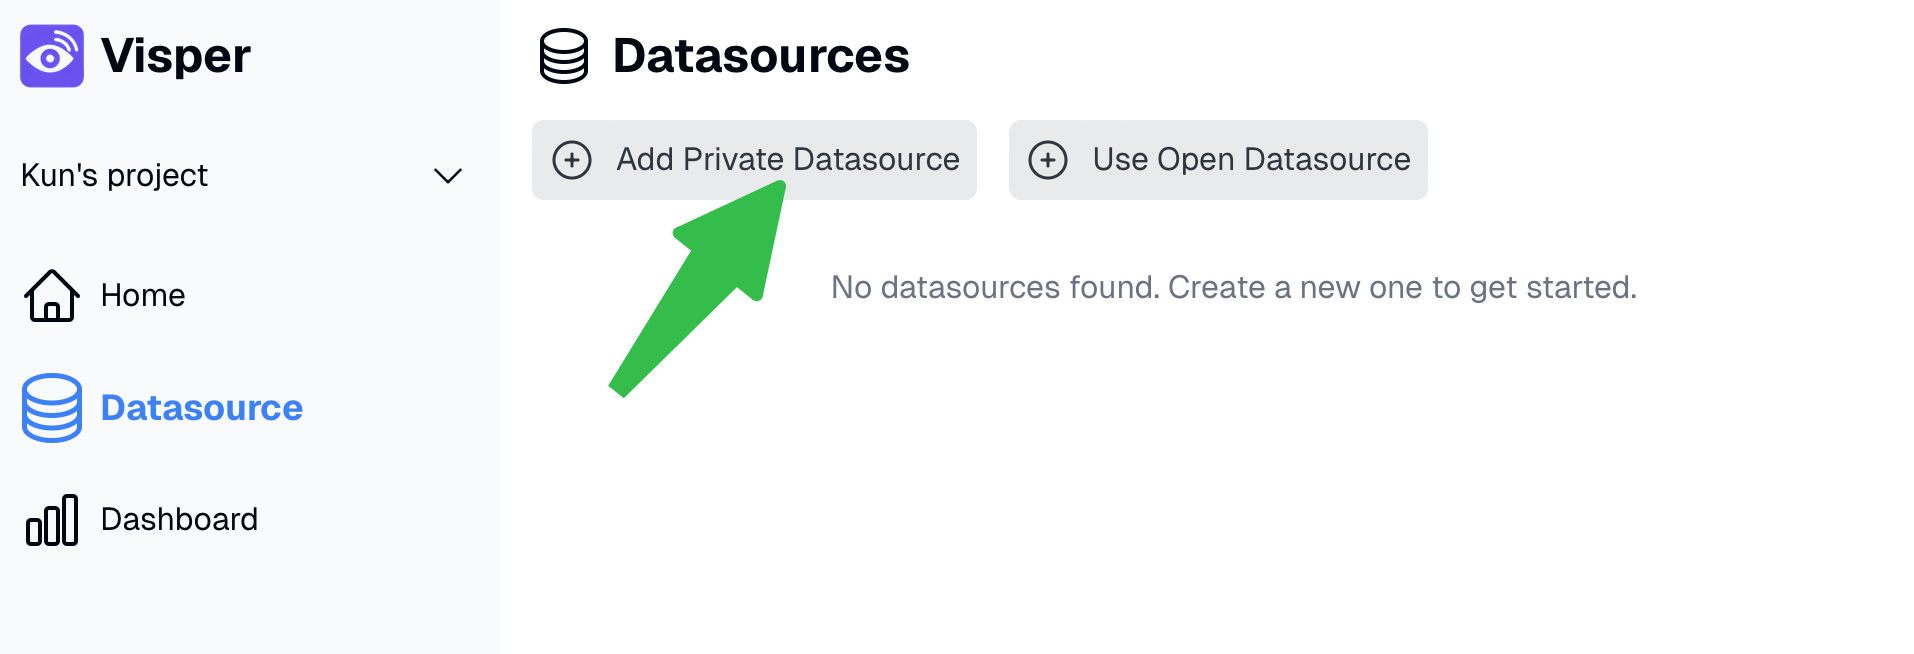
- On the datasource page, click the "Add Private Datasource" button.
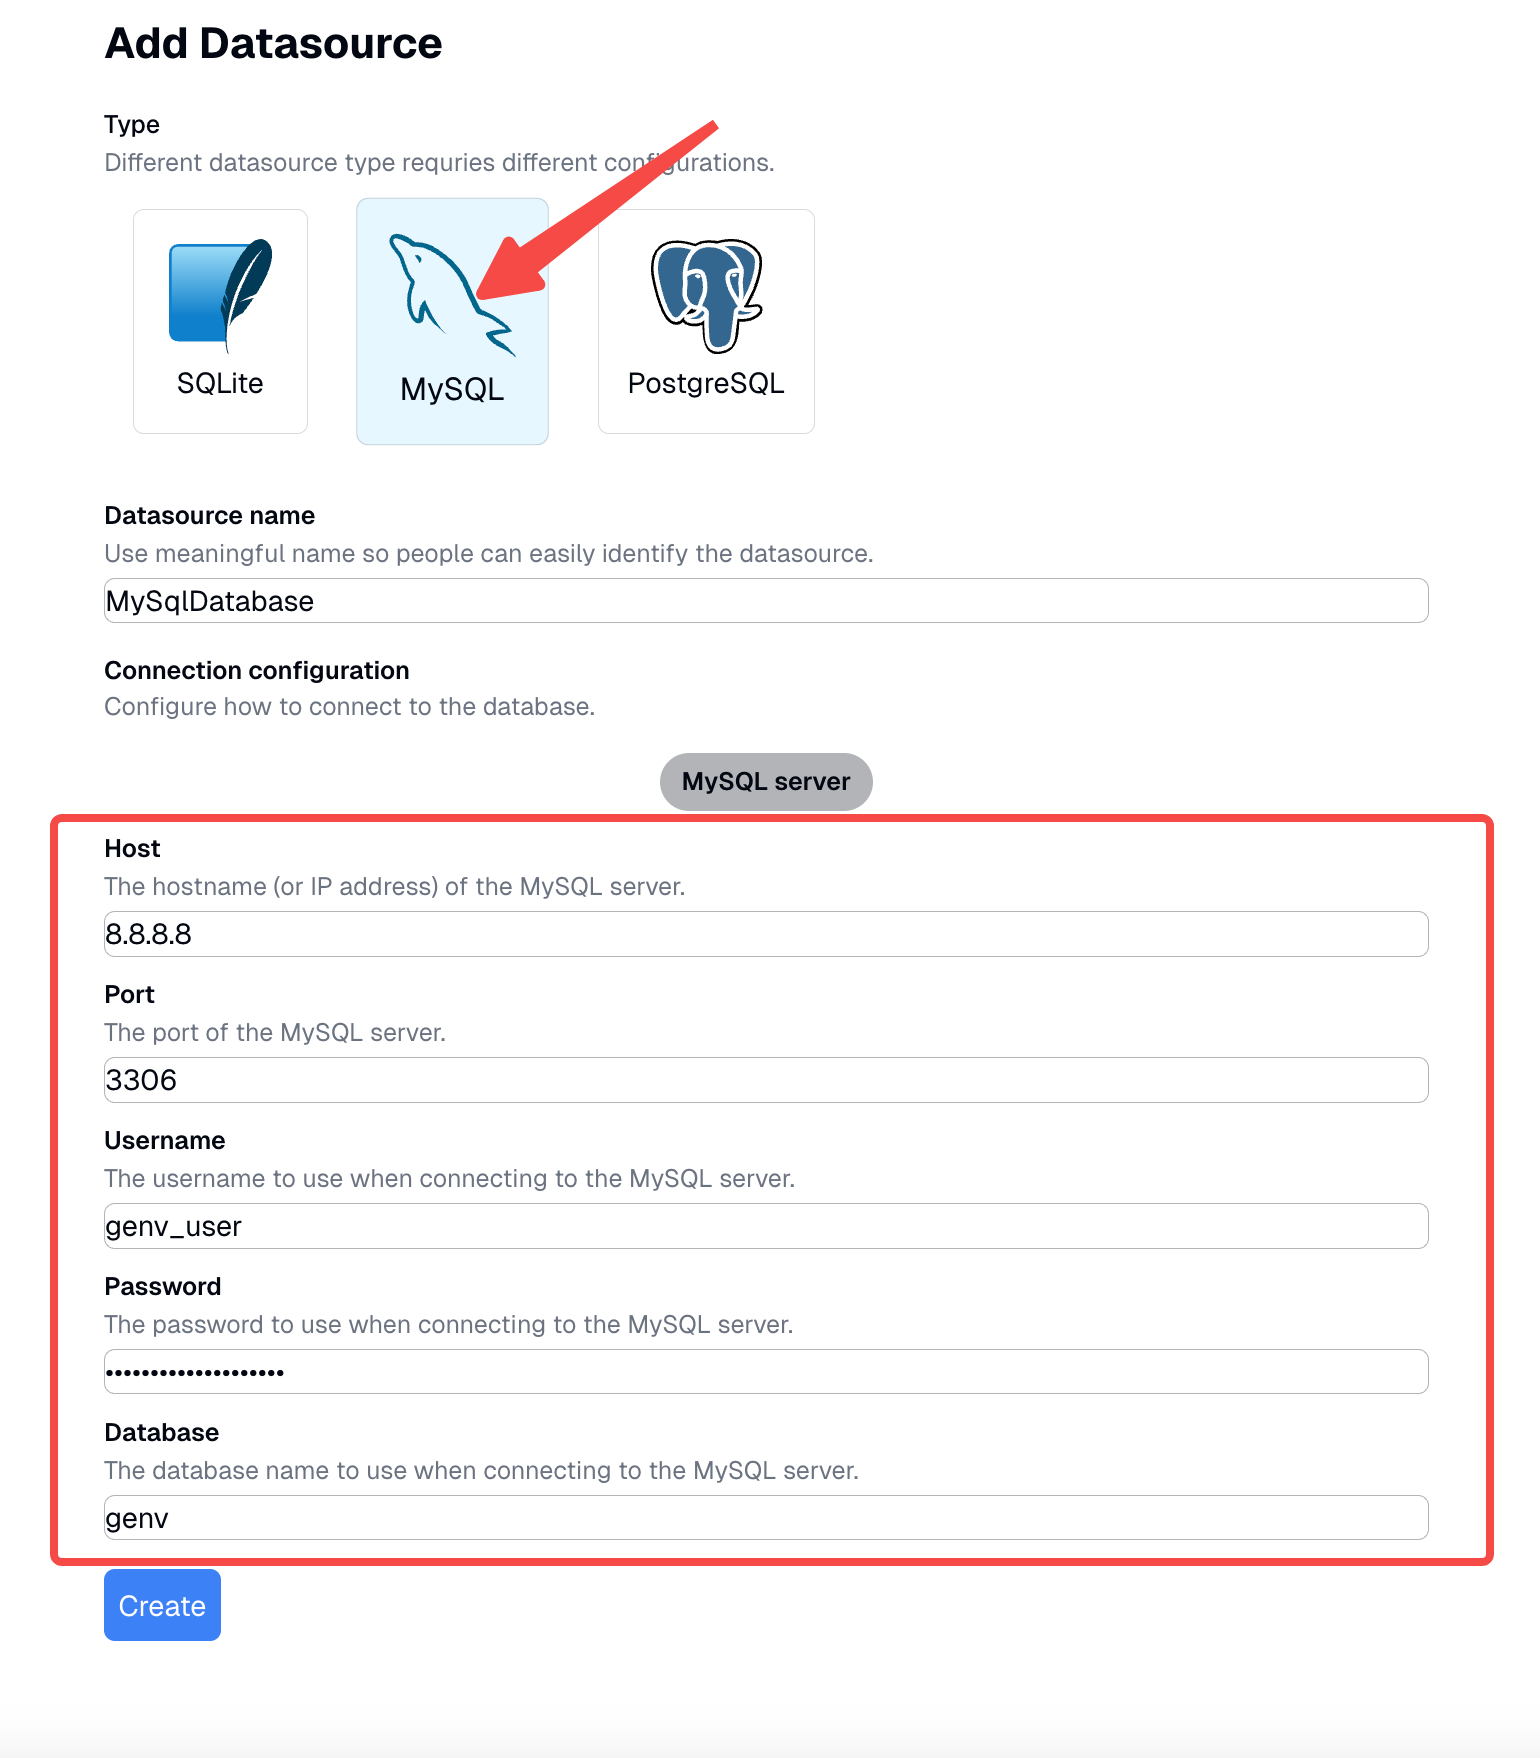
- Select "MySQL" as the database type.
- Fill out the Connection configuration section with your database details.
- Host: The hostname or IP address of your MySQL server.
- Port: The port number for your MySQL connection. The default is 3306.
- Username: The username for connecting to the database.
- Password: The password for the specified username.
- Database: The name of the specific database you want to connect to.
Security First
Visper has built-in security mechanisms to ensure all connections are read-only, meaning the system will never modify your data. For additional security, it's a best practice to:
- Create a dedicated MySQL user with read-only permissions specifically for Visper.
- Limit allowed tables to only what you want your team to query
Test the Connection
Before creating the datasource, Visper will attempt to verify the connection. If it fails, check the error message and correct any issues, such as a wrong username or password, or a firewall blocking the connection.
2. Configure the Database Schema
Once connected, Visper automatically analyzes your database schema. You can then configure it to fit your needs.
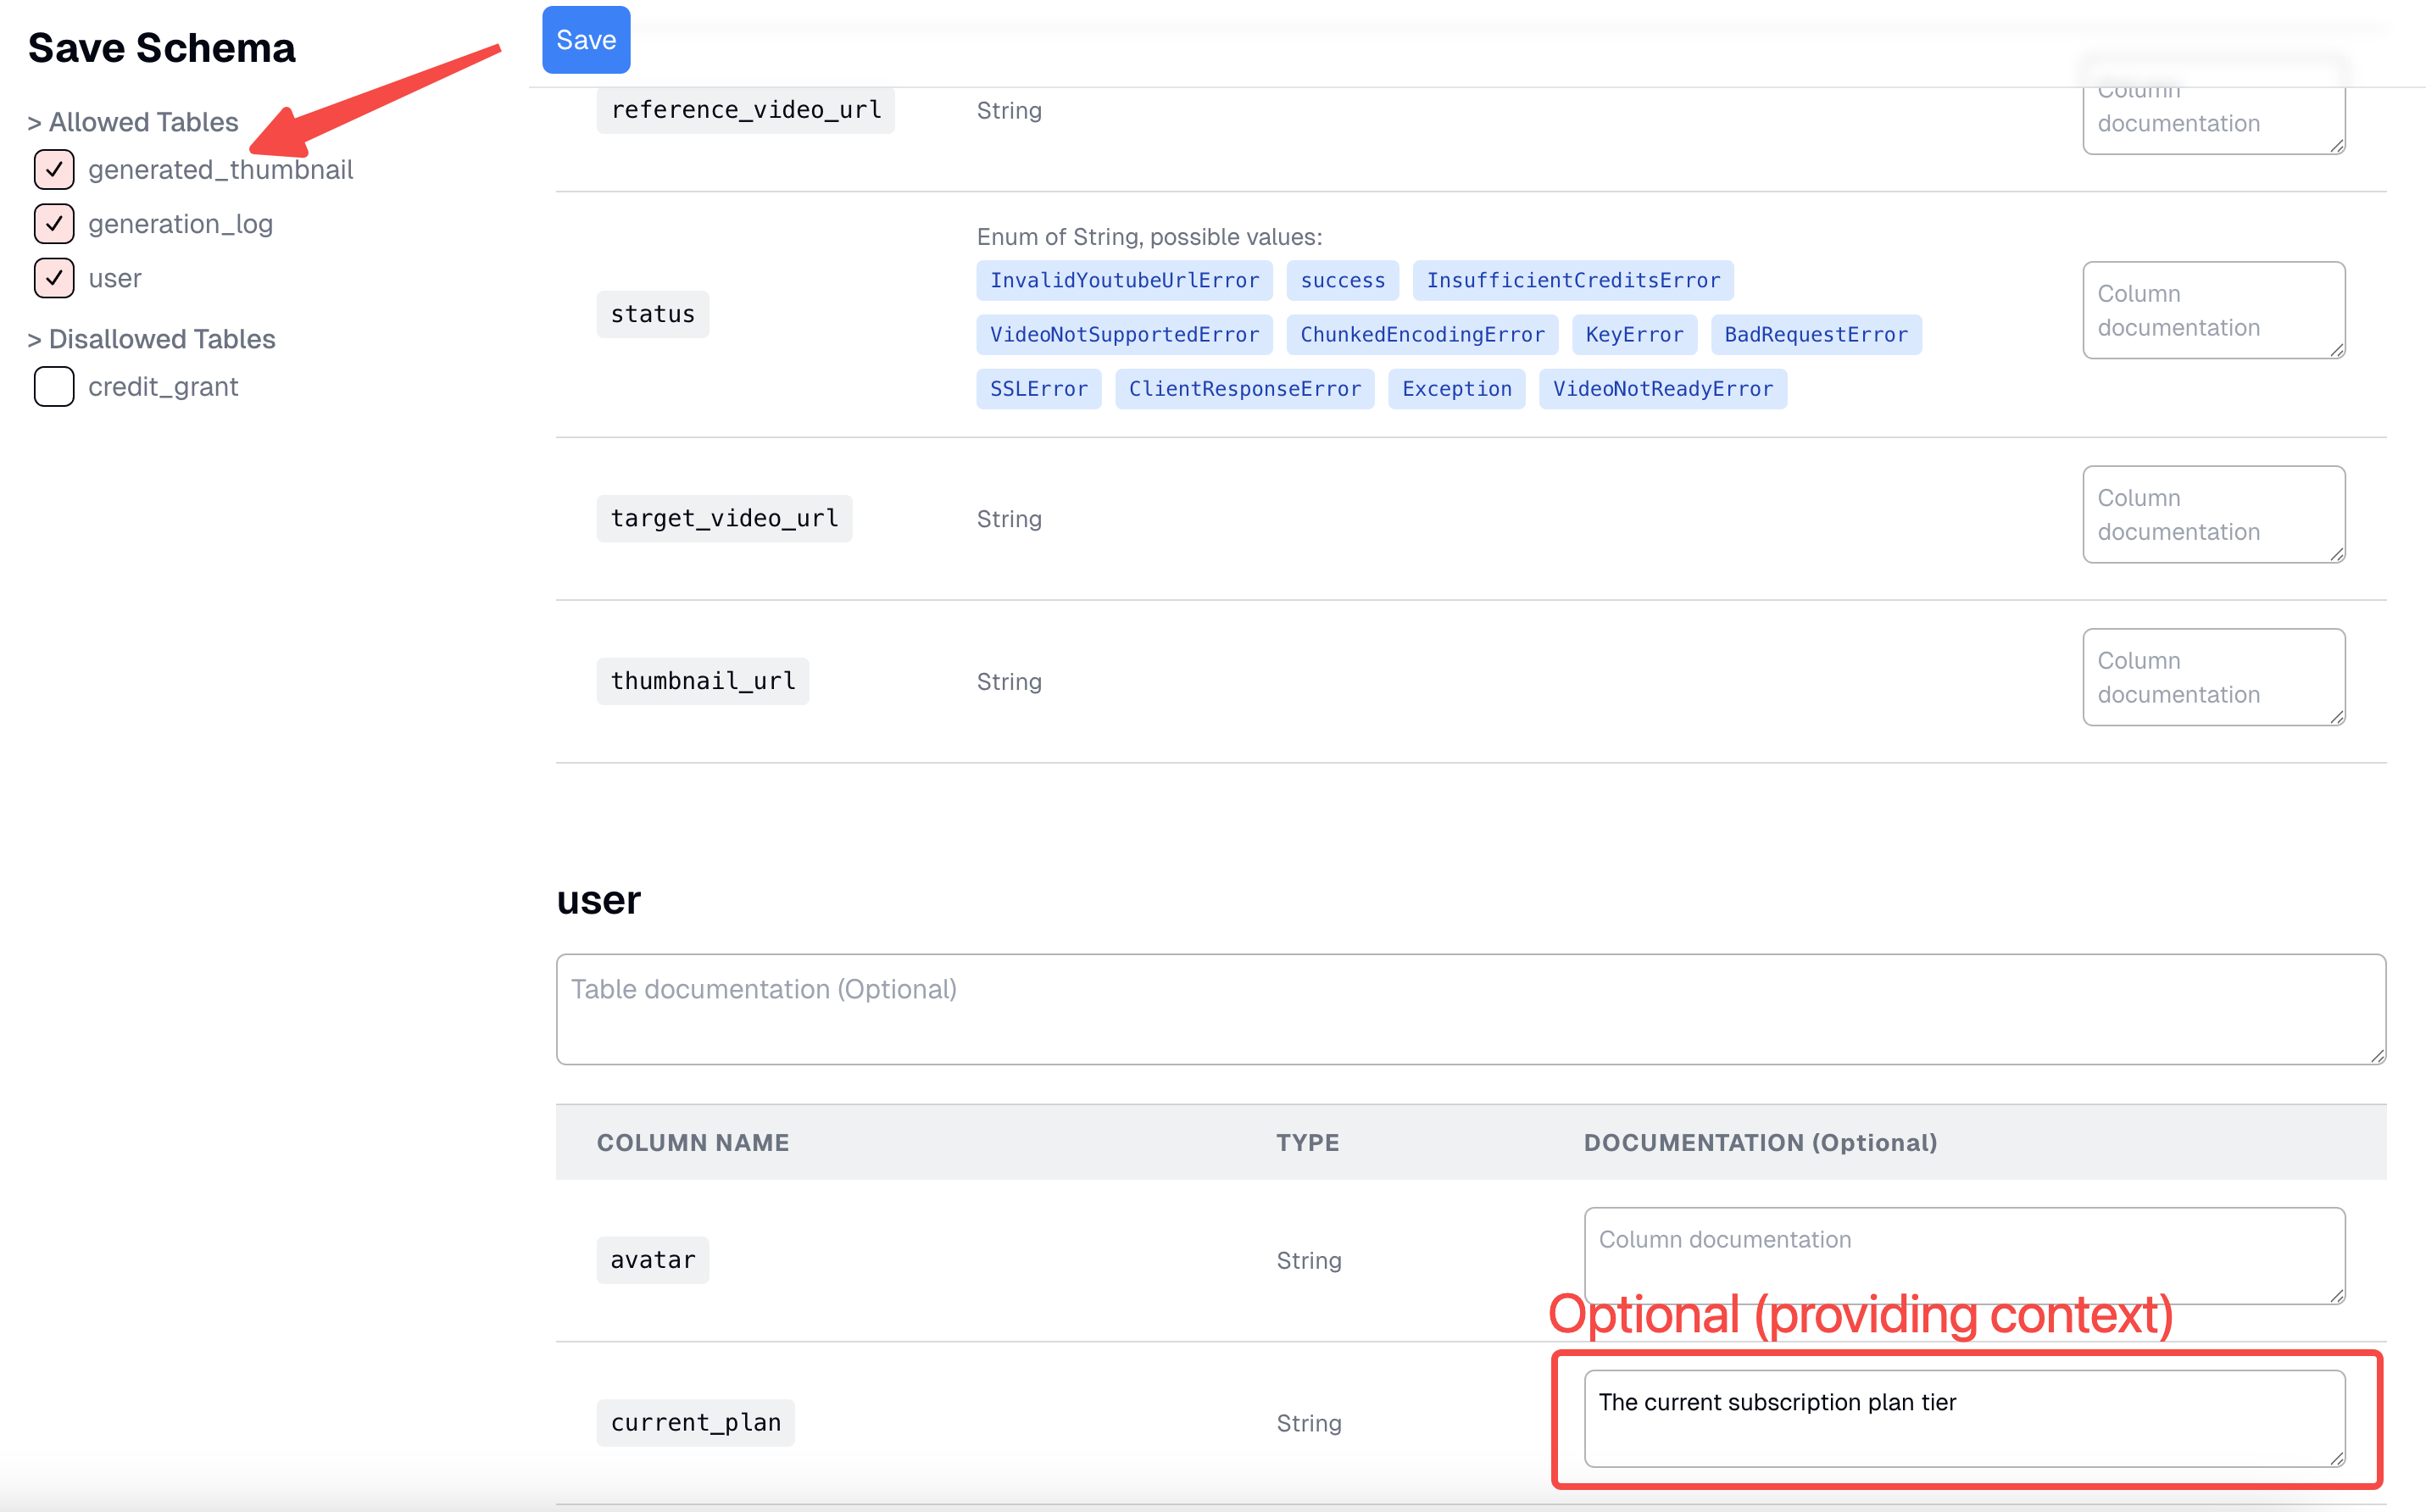
- Add optional documentation for tables and columns. Providing this business context helps the AI understand your data better, leading to more accurate and tailored answers.
- By default, all tables are disallowed. You need to explicitly enable the tables you want your team to see and query.
- Click the "Save" button to finalize the schema configuration.
You can now navigate to the datasource page and begin using the chat interface to query your data.
3. Keep Your Schema Up to Date
Databases are dynamic, and schemas can change over time. Visper makes it easy to keep your schema in sync.
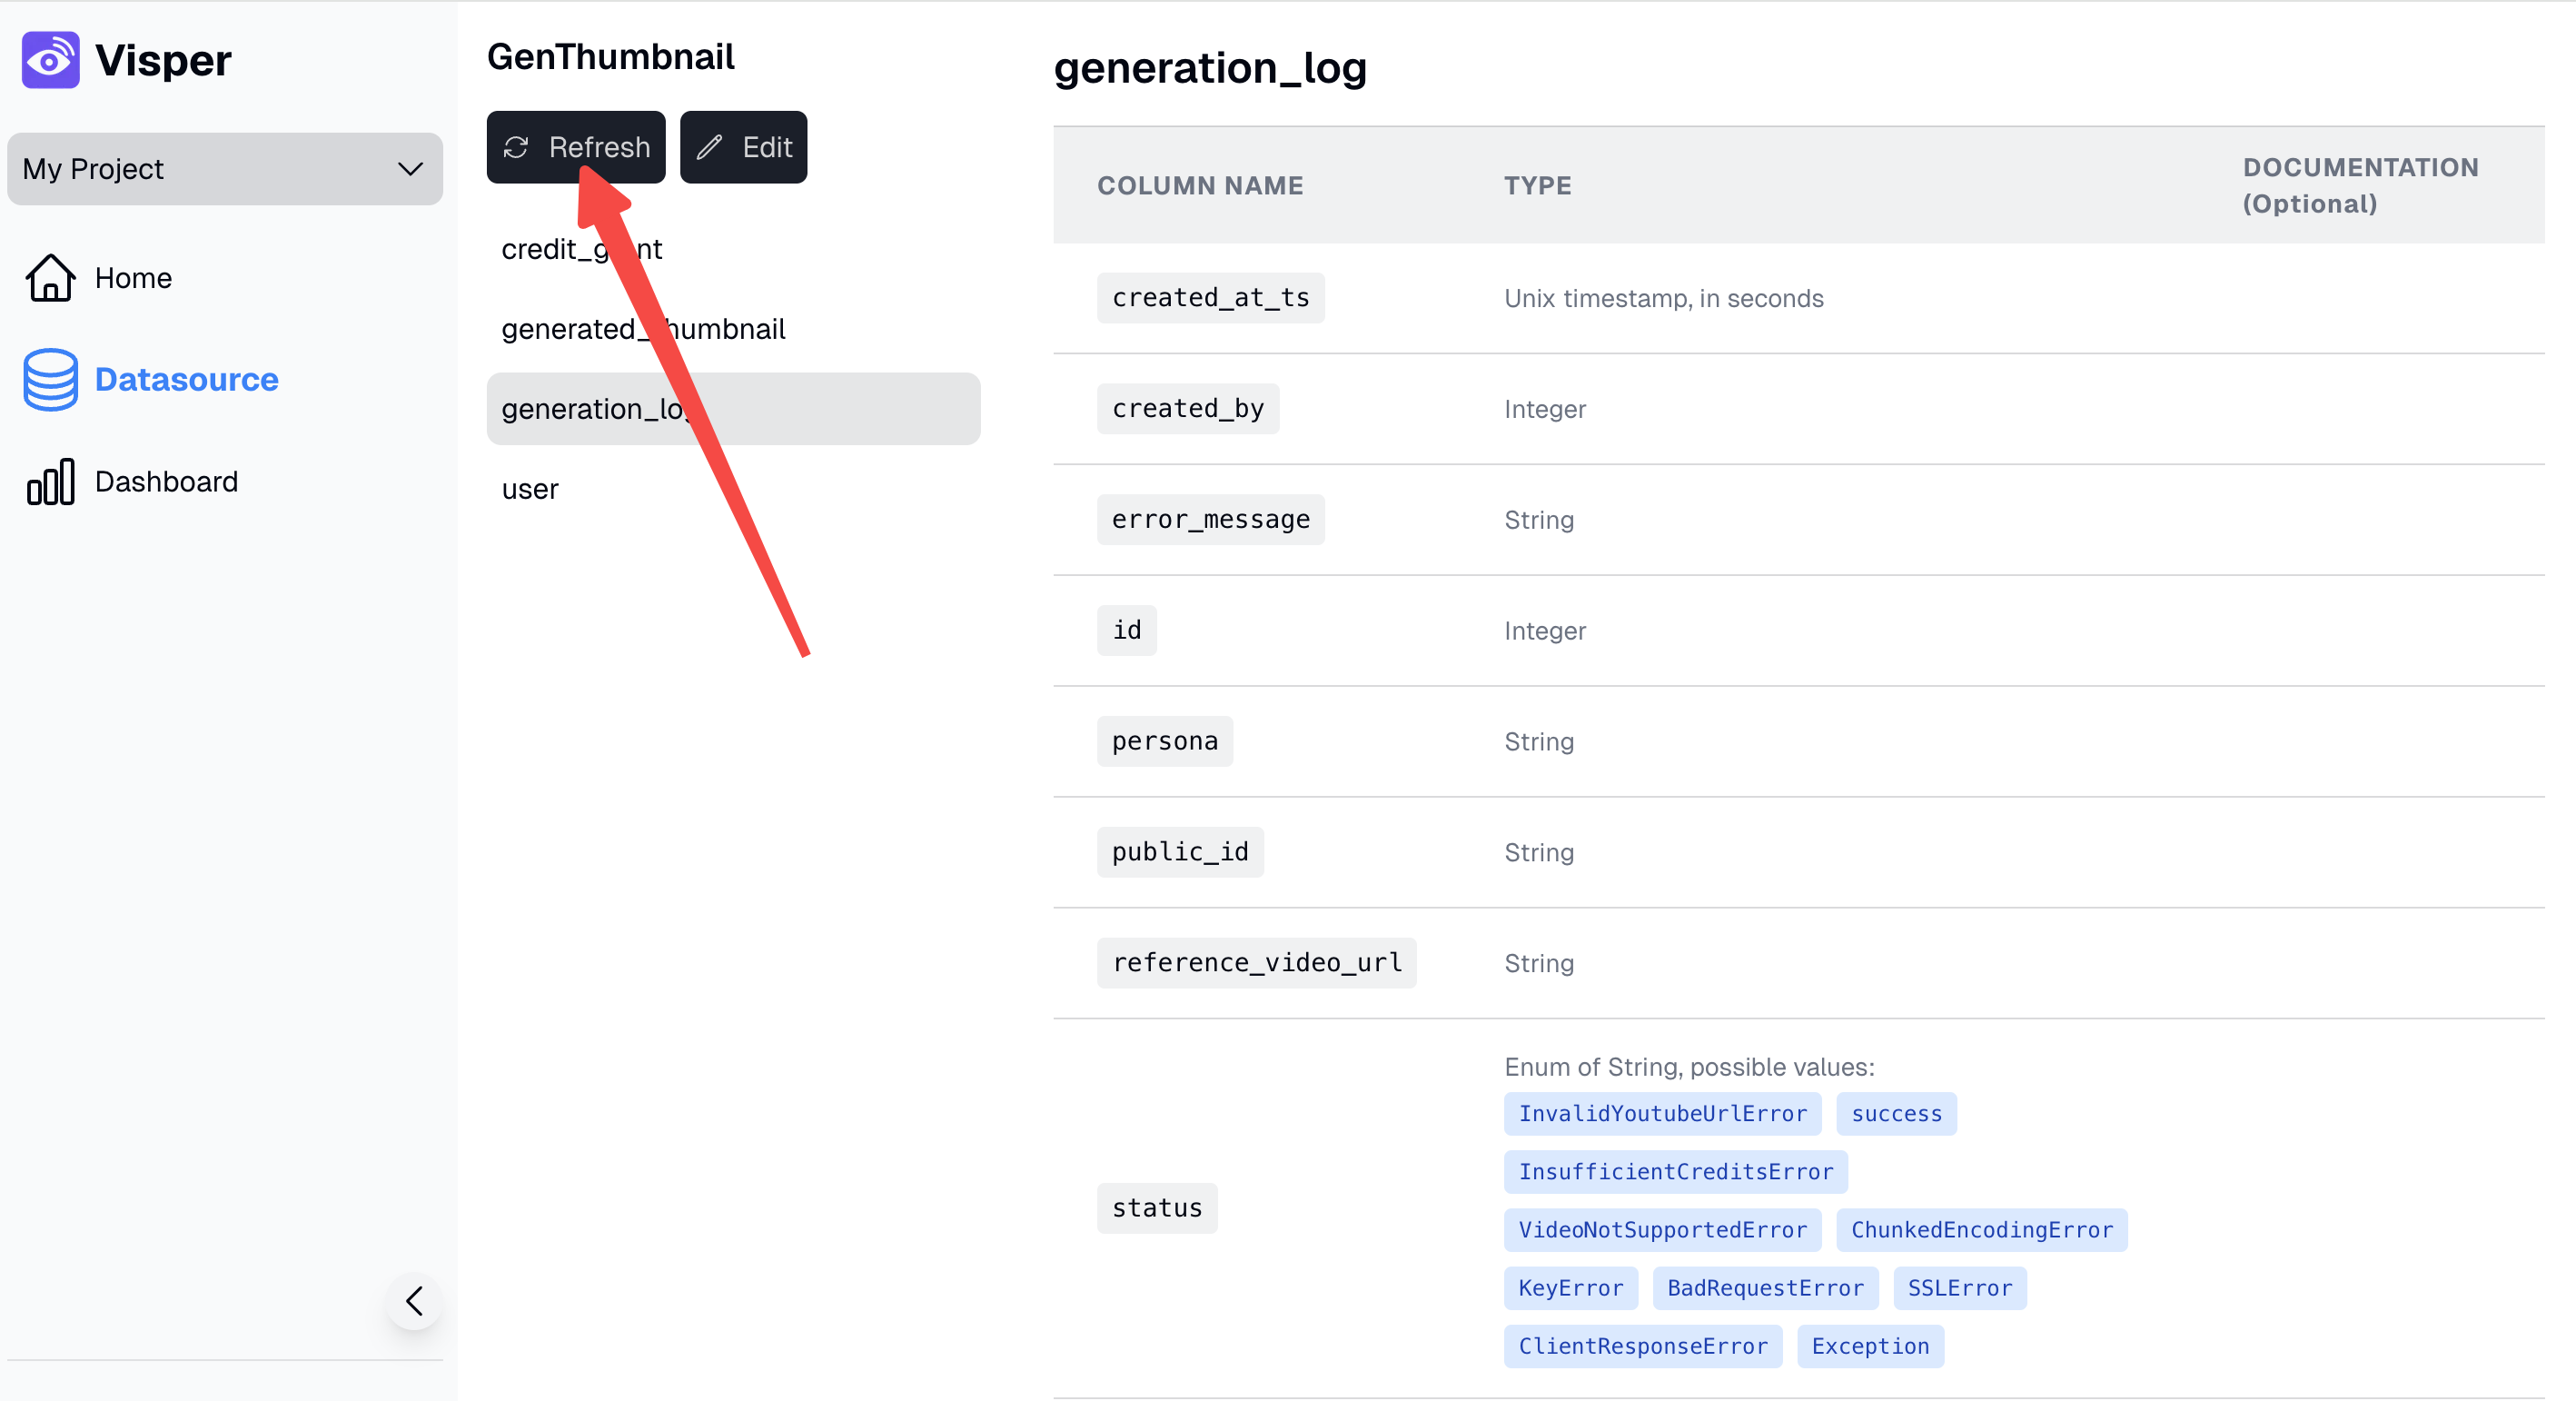
- If you add, remove, or rename a table or column in your MySQL database, you need to sync these changes in Visper.
- On the database list page, click the "Schema" link for your datasource.
- Click the "Refresh" button.
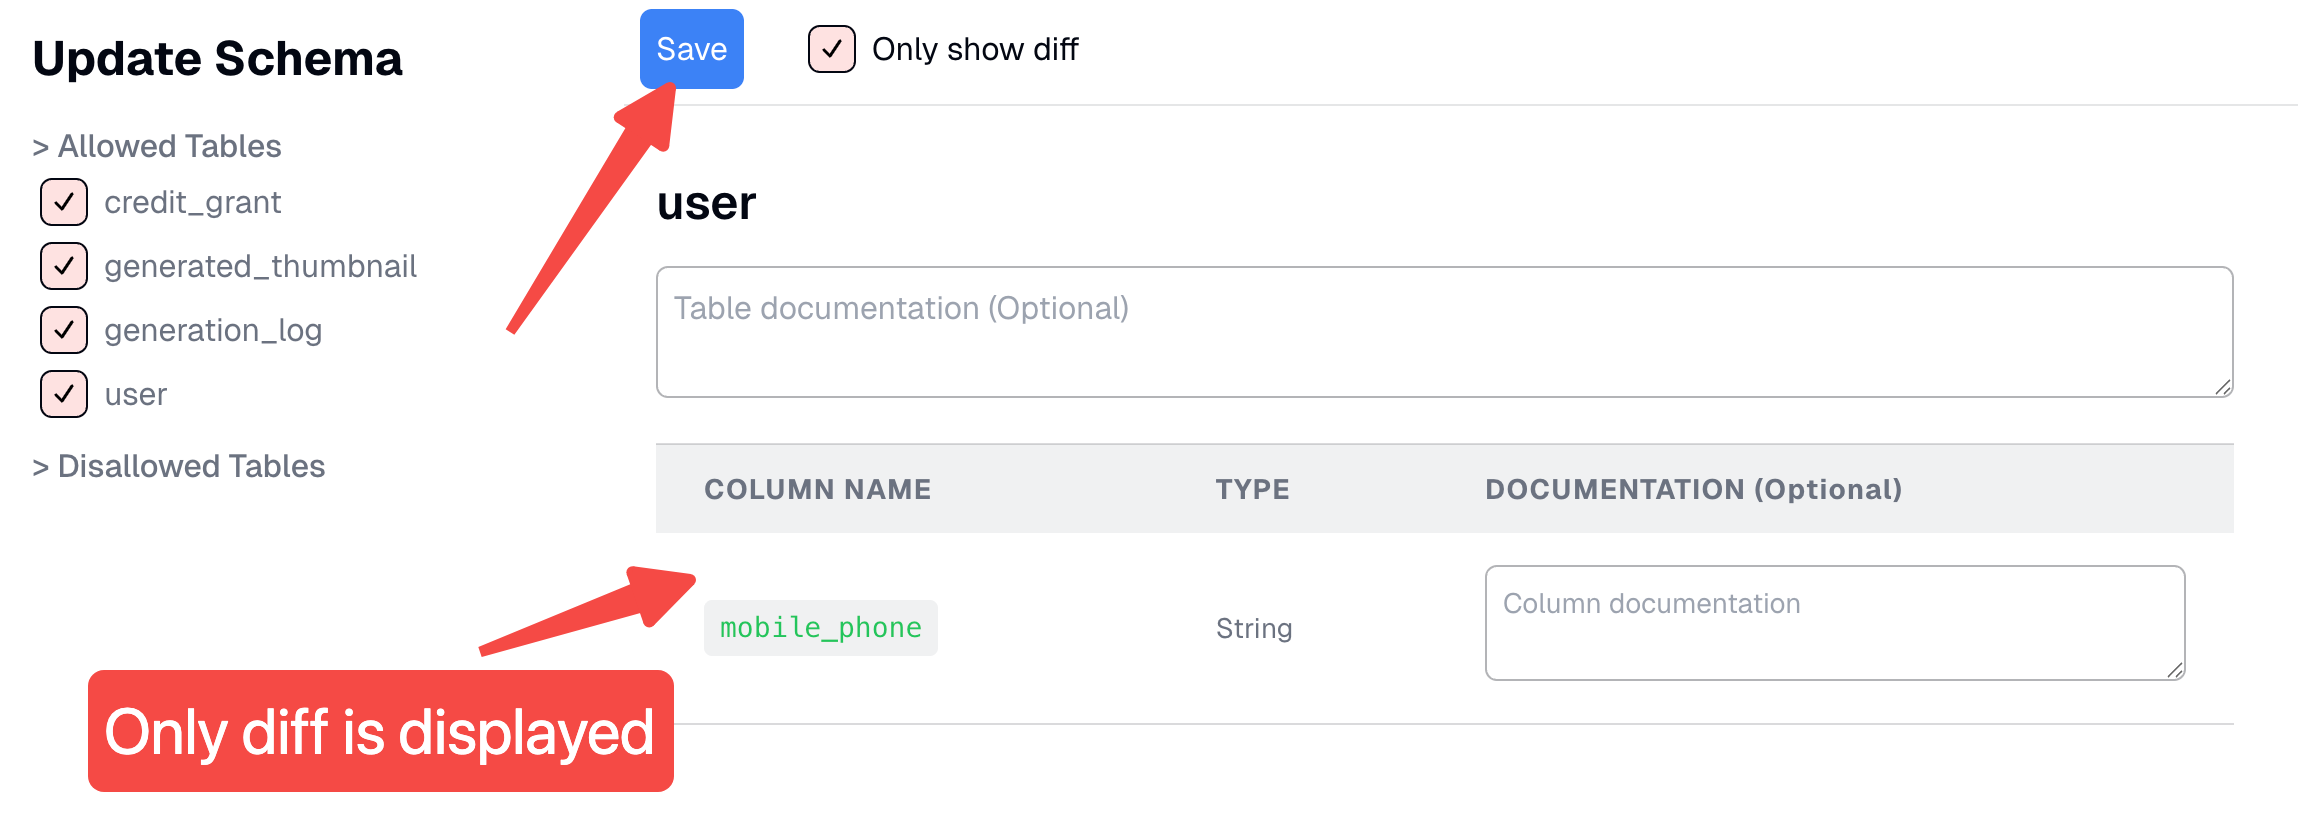
- Visper will analyze the current database schema and show you the differences. You can review the changes, add documentation for any new tables or fields.
- Click "Save" to apply the updated schema.
Why Teams Love This
With your MySQL database connected, Visper becomes a single source of truth your team can actually talk to.
You get:
- Faster answers without writing SQL and code
- Context-aware results from your own data
- Live dashboards that update as your database changes